
BTS: London & A DIY Frame Project
This month we started off with some great questions from the group. I then shared some photos and videos from the design conference I attended in London. There was a request to share more about some frame and print photos, so I’ve included those plus DIY instructions, below.
Framing Inspiration to DIY

If you’re looking for a DIY art project, here’s some inspiration.
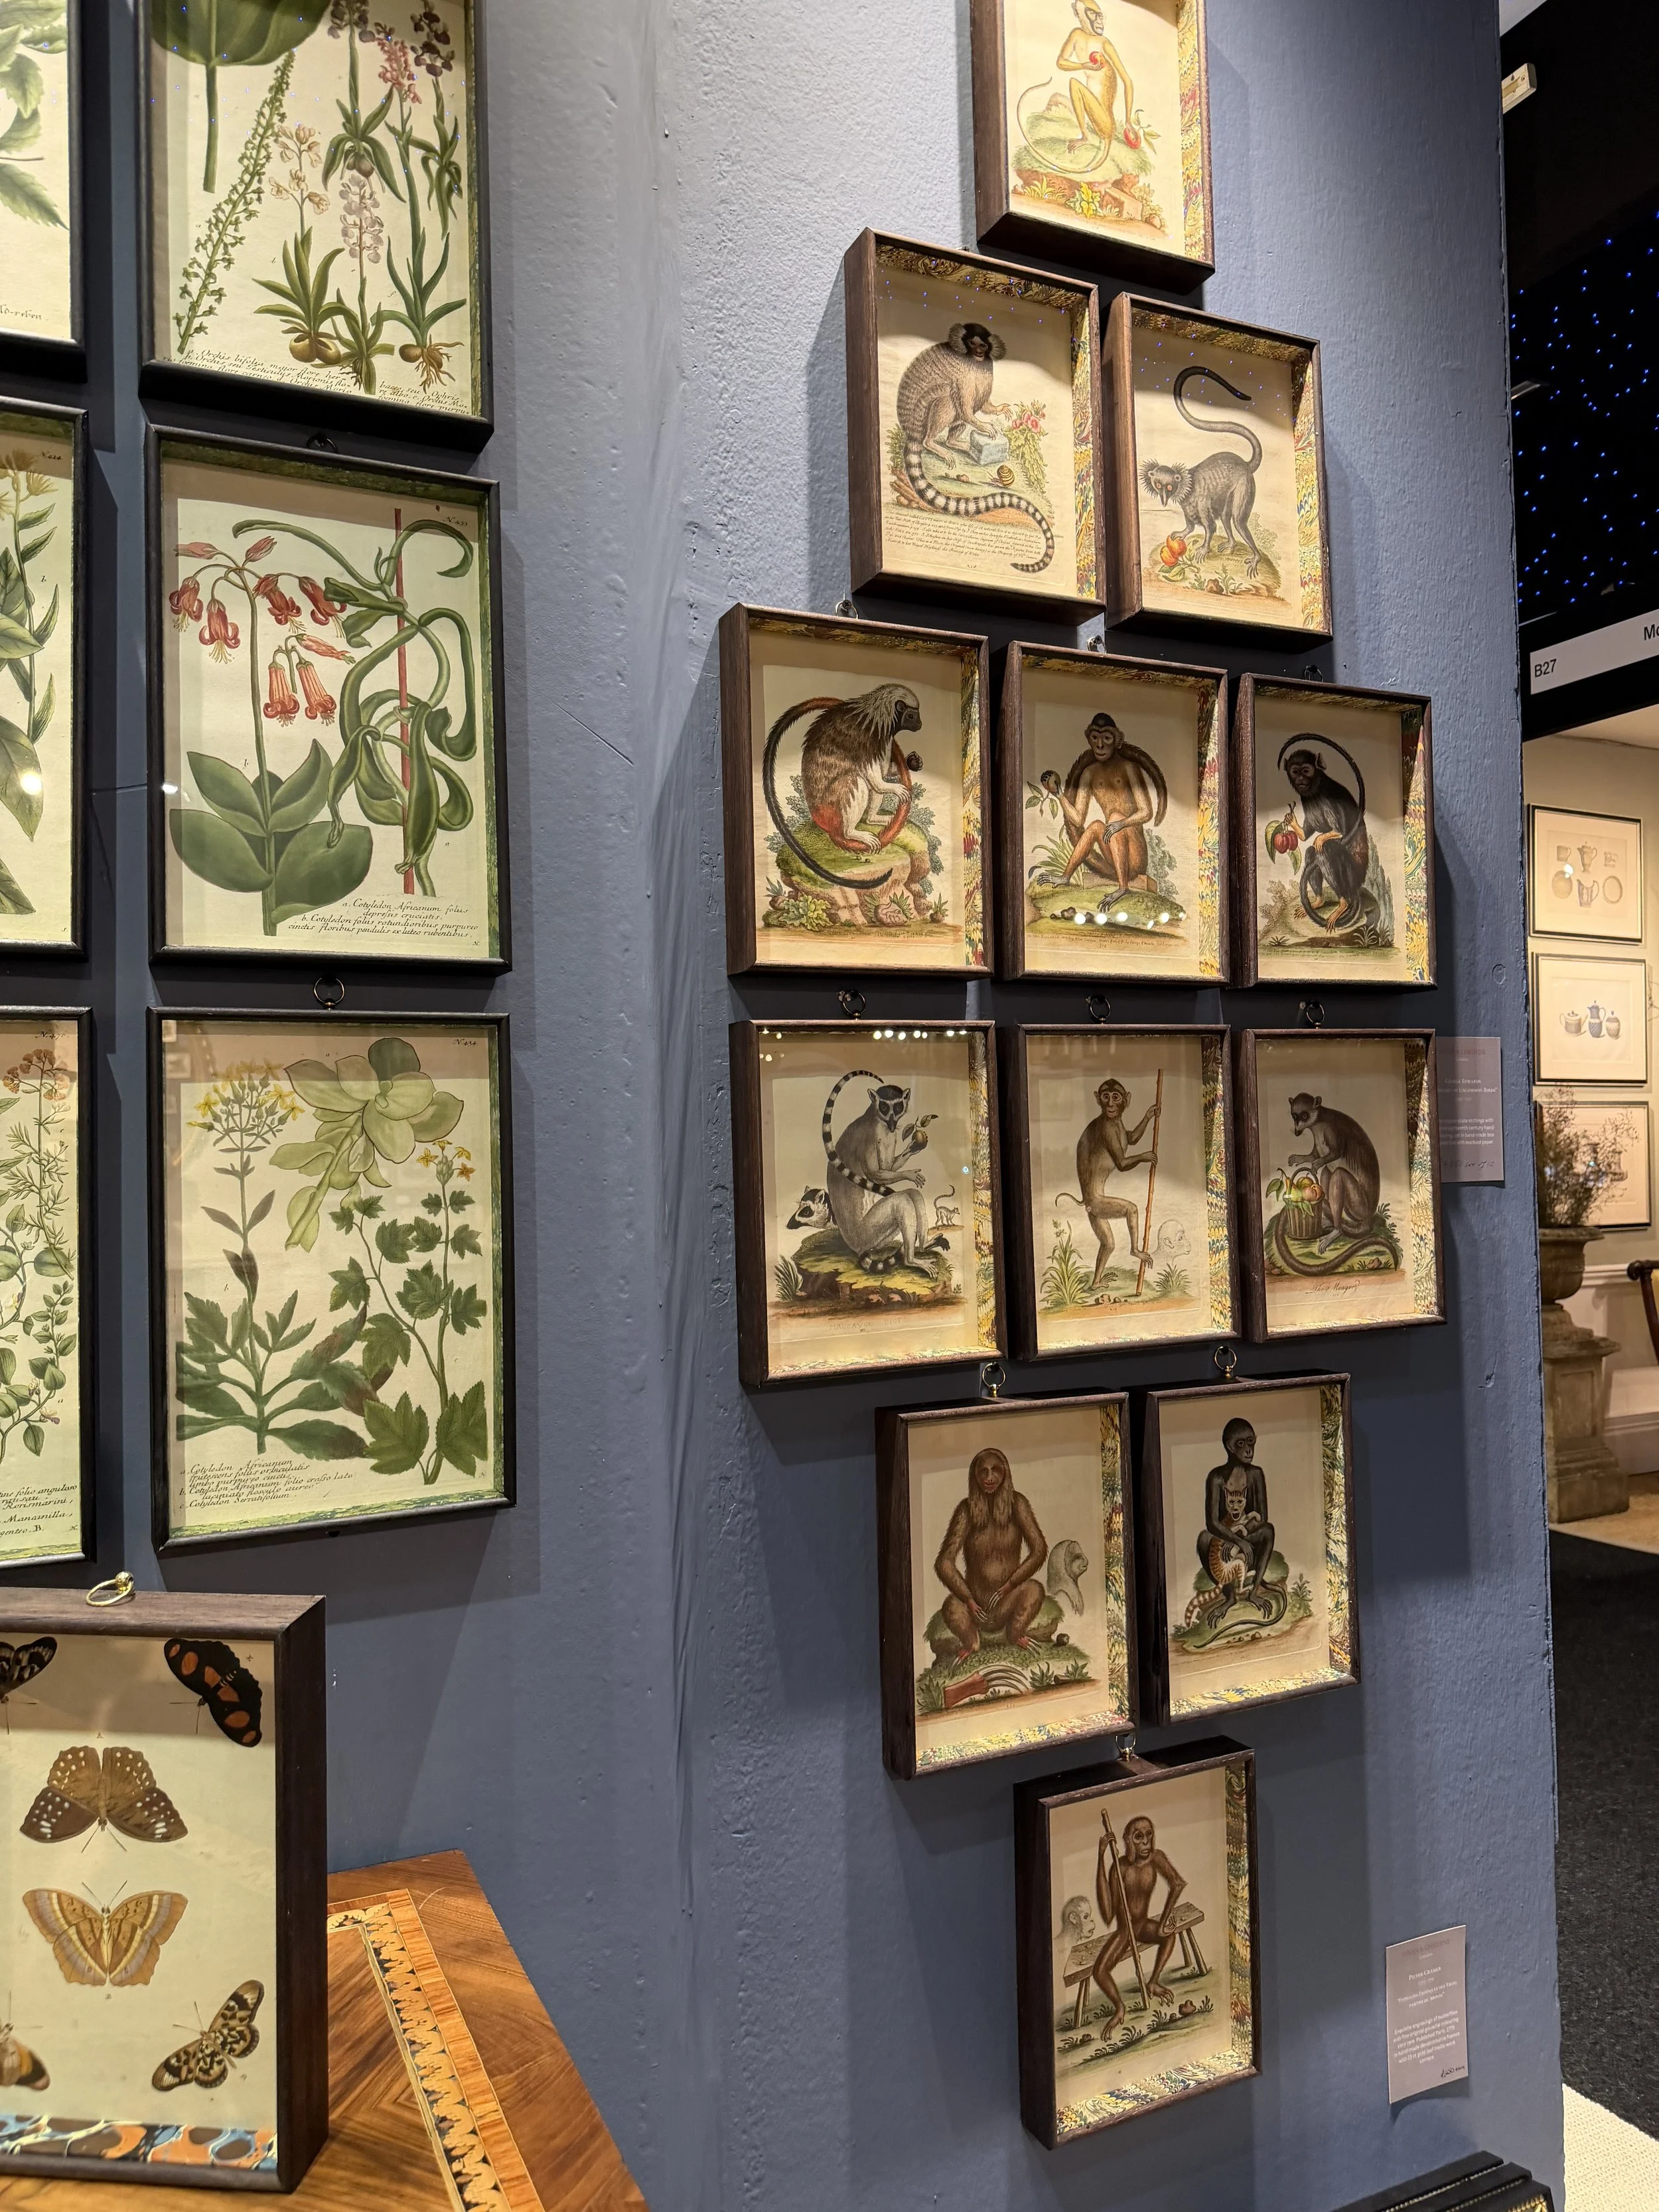
The idea is simple. You decoupage (which is a fancy way of saying gluing images onto furniture or objects) a frame and use an image of flora or fauna.
Supplies:
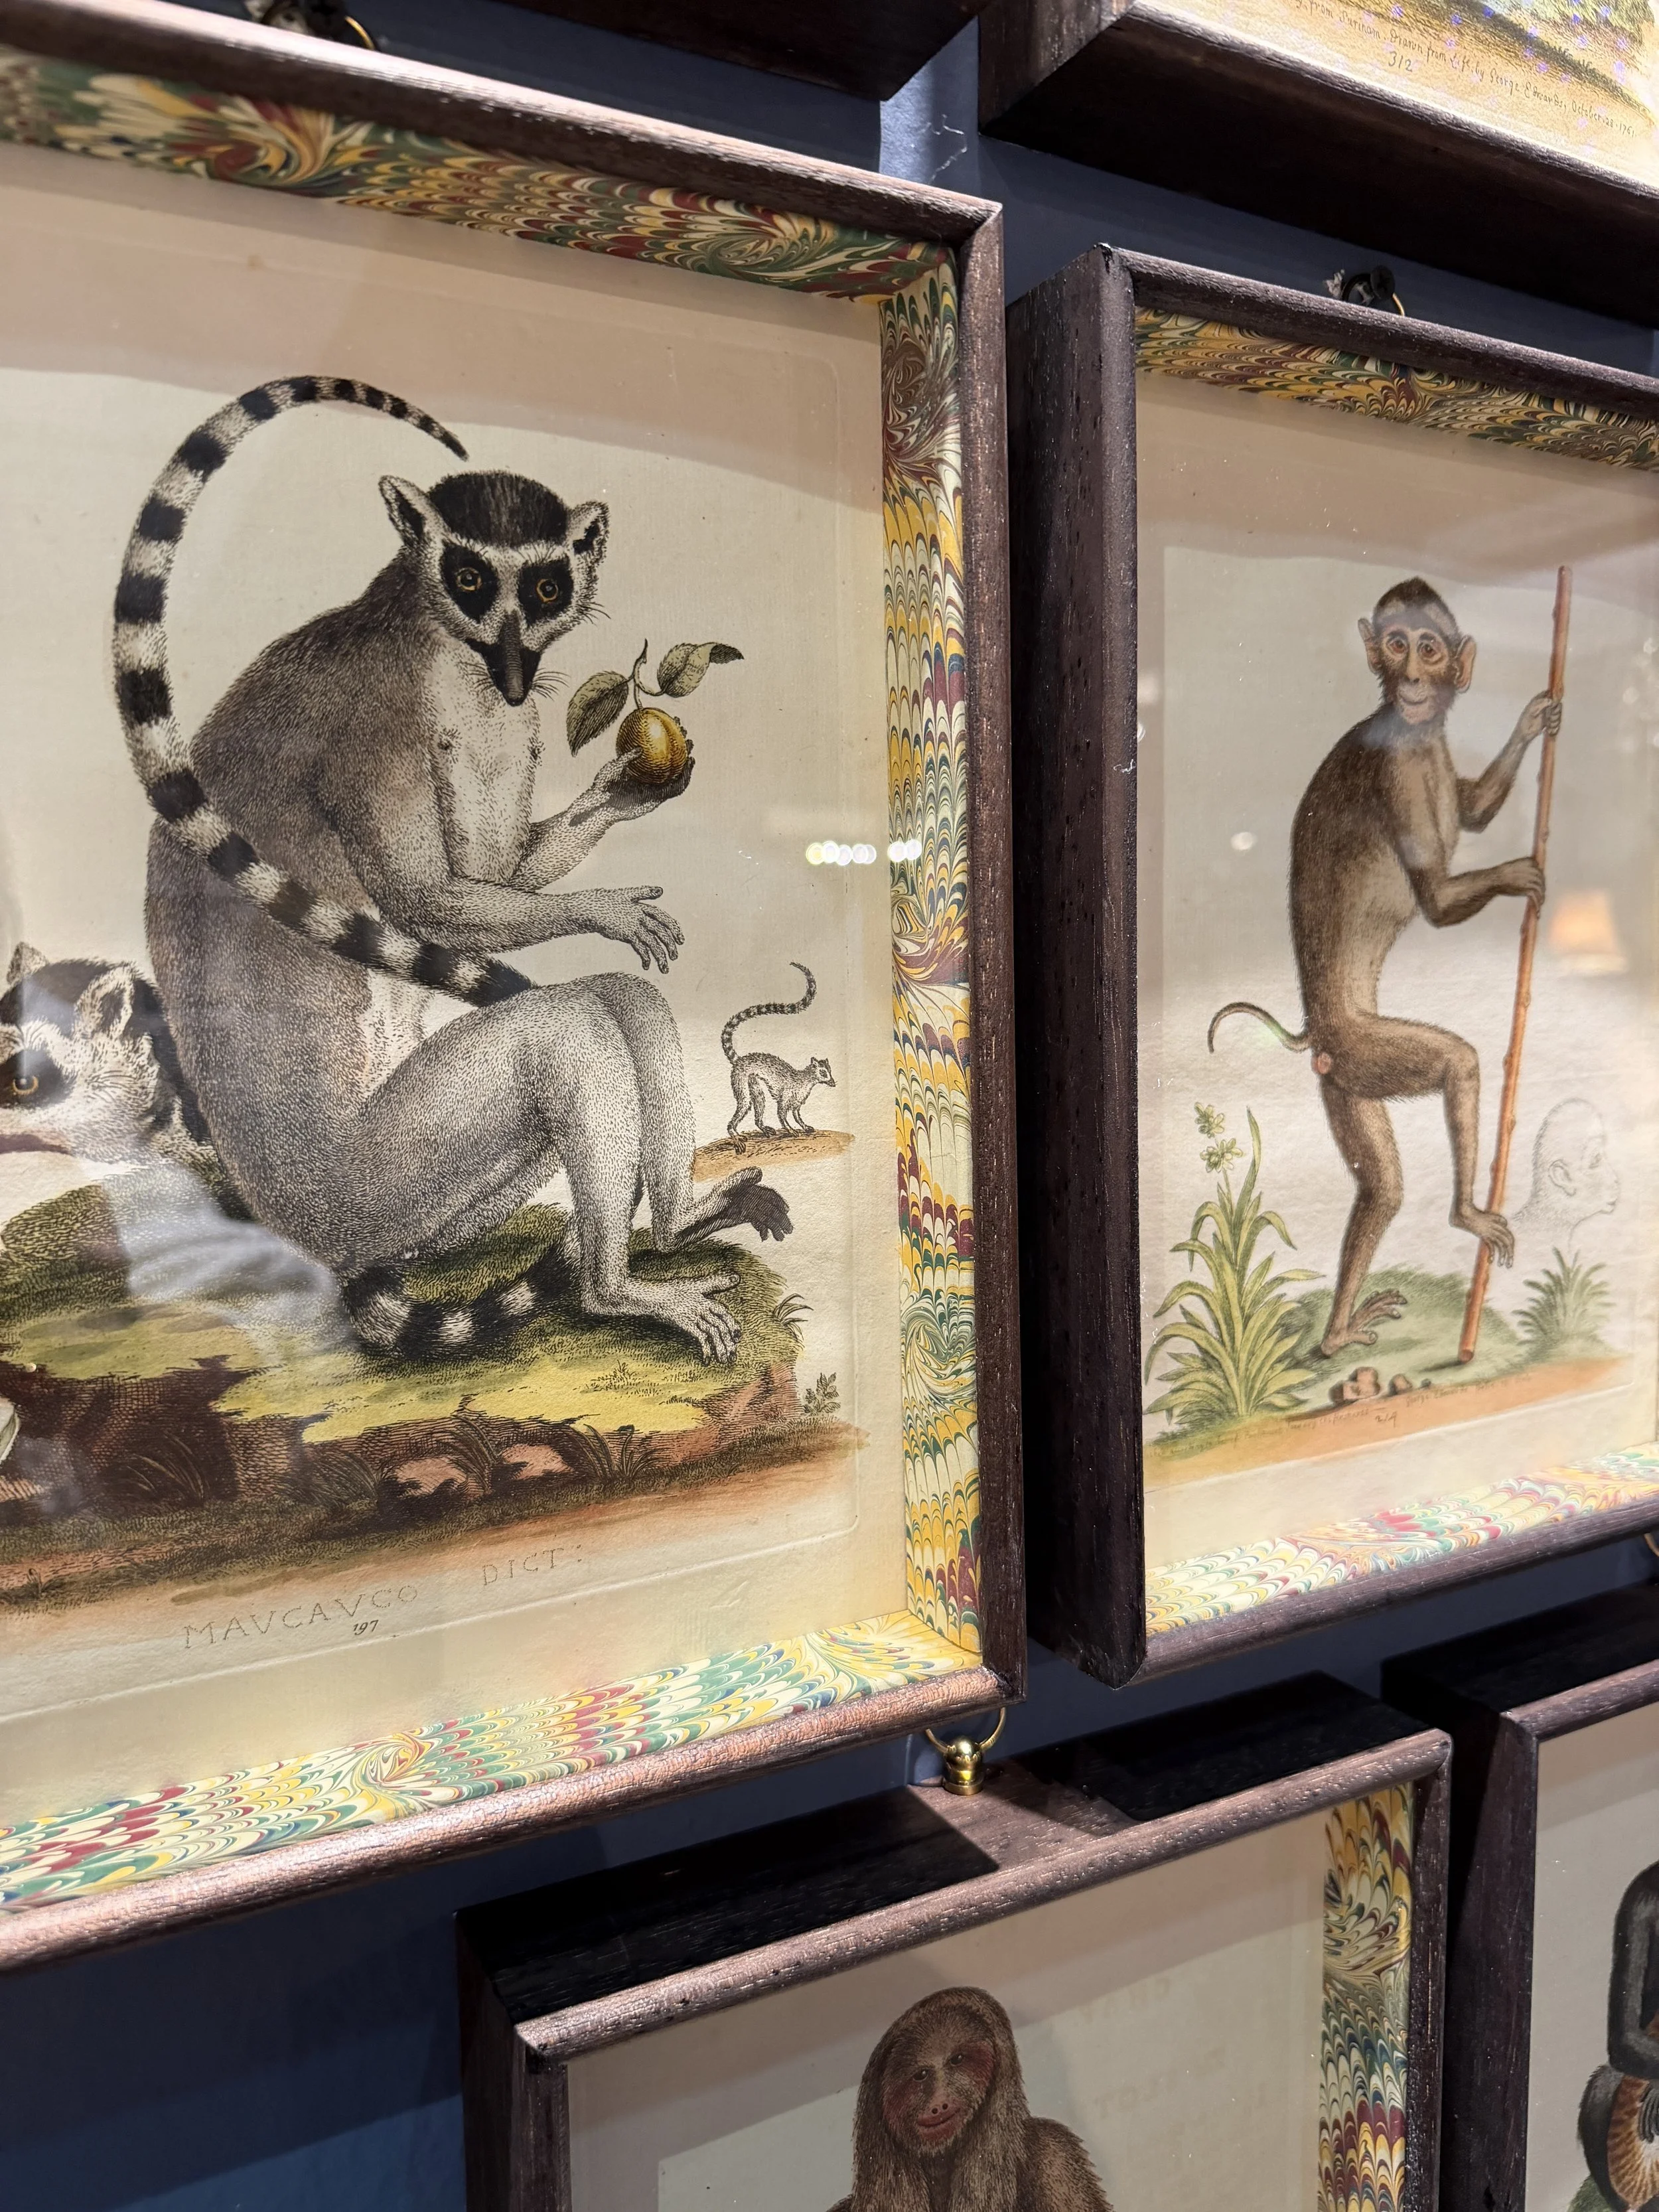
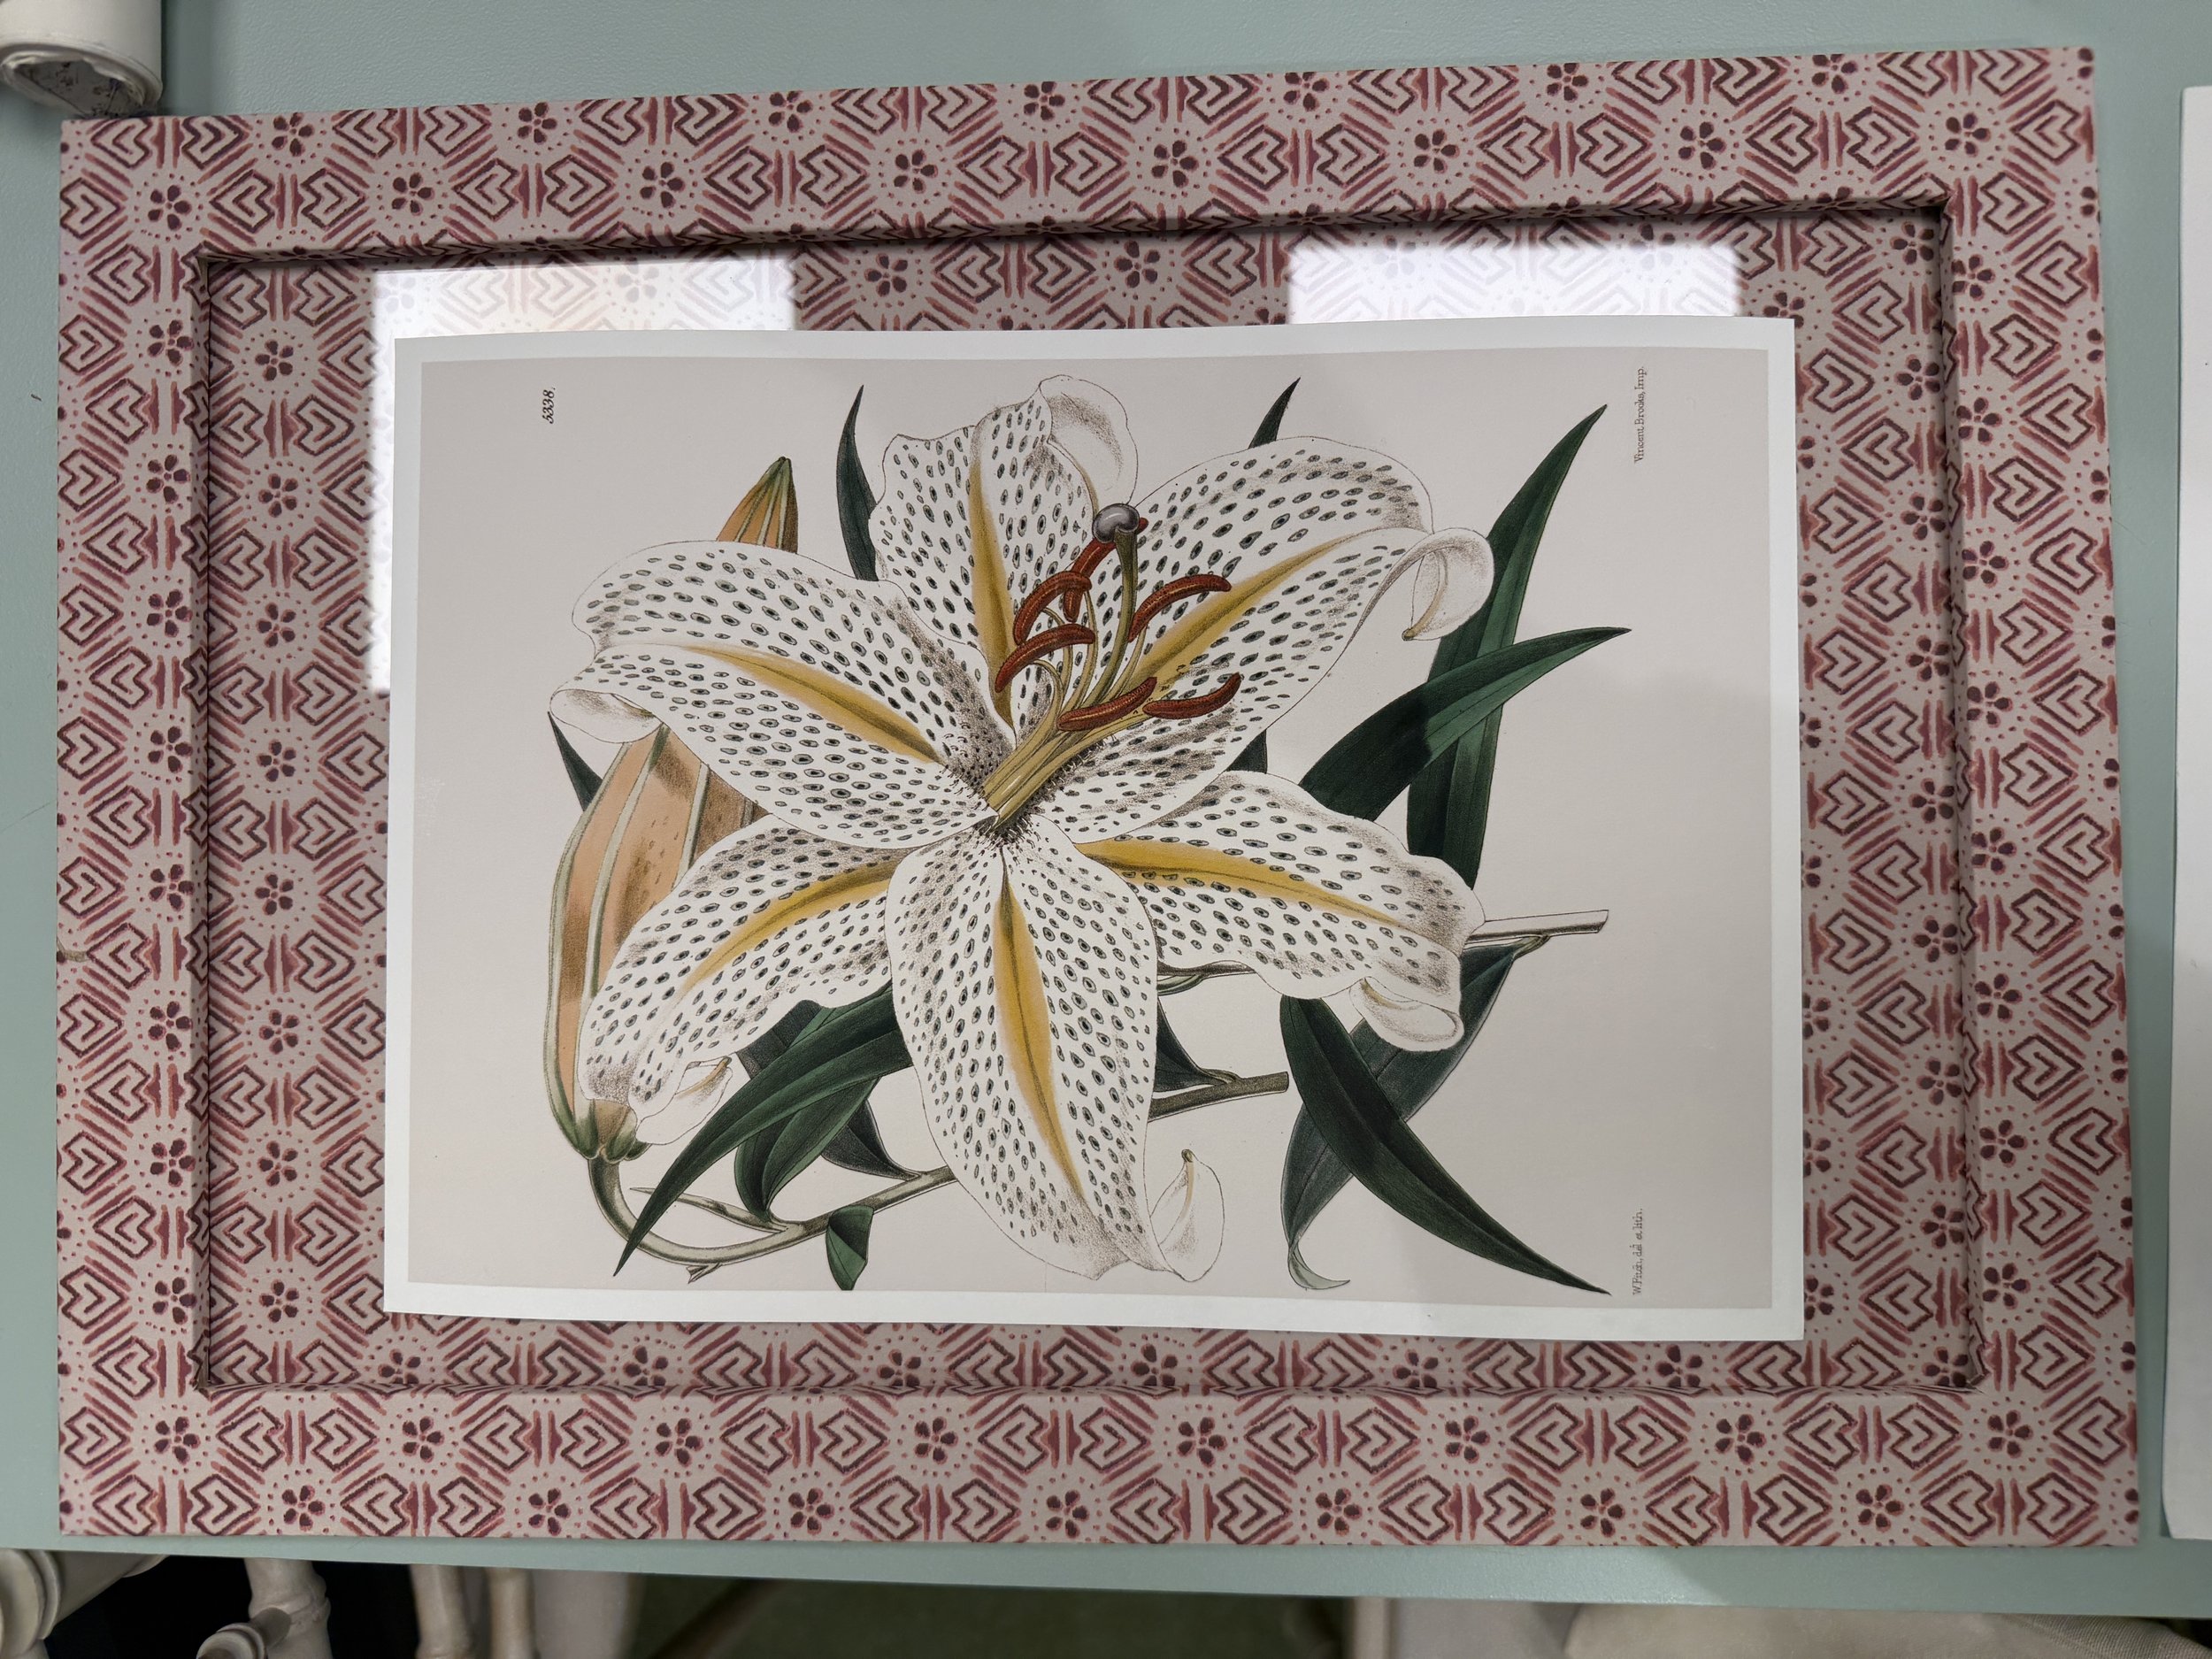
Wood frame > In these examples, you see a frame that has an inside edge to it with a depth that can accommodate some paper; and a flat faced frame that also has enough surface area to accommodate paper.
Paper > In these examples, they’re using wallpaper but you could also try wrapping paper (if it’s not too thin).
Glue > ModPodge is the easiest thing to find. See below for a note on choosing gloss or matte.*
Bone Folder > This is for getting out any air bubbles as you glue the paper down. OR you can use a credit card in a pinch!
Mat > For the example with the monkeys, you’ll choose a mat that matches the color of your 'print’s background; for the botanical example, the color of the matt doesn’t matter, as long as it doesn’t show through your paper.
Print > Your choice!
Resources:
Frames: Try thrift stores for old frames or order online or pick up at a craft store.
Paper: Find a large selection of papers that work well for decoupage online. I like https://www.papersource.com/ . You can also find vintage wallpaper at antiques fairs and sometimes at antiques stores. Or you can use wallpaper scraps from an old project you’ve done.
ModPodge, Bone Folders & Mats: you can find at craft stores or online.
Prints: Try thrift or antique stores for old books of flora and fauna and cut out the prints. Or you can find single prints at antiques and vintage shops or online.
How Tos:
Measure the length and width of the areas of the frame you’re covering. Cut out the paper accordingly. If you’re covering the flat face of a frame, add an extra inch or two to the width because you’ll be wrapping the paper around the edges of the frame.
Apply a thin layer of ModPodge on the frame, being sure to apply the glue out to the edges.
Lay the paper down. It may be helpful to start at one end or corner and line the paper up before rolling it onto the length of the frame.
Use your bone folder or the edge of a credit card to swipe across the paper from one edge to another. Apply a bit of pressure and you’ll see the extra glue start to come out. You’re pressing out air bubbles and making sure the paper is absolutely flat against the frame.
If desired, you can apply a top coat of ModPodge over the paper once the underlayer of glue is dry. This will seal the paper, giving you a smooth(er) finish. You can buy ModPodge in either gloss or matte for this purpose. * If you prefer to leave the paper as is, that’s fine, too.
If you’re using the botanical example as your guide, you’ll then cover the mat in the same way as you’ve done the frame. Make sure you choose a section of paper that lines up in a pleasing way with how the paper has been applied to the frame. This way the frame and mat look like an extension of one another.